How do I add checkpoints?
Introduction
Checkpoints allow users to be in different stages of an obstacle course.
Steps
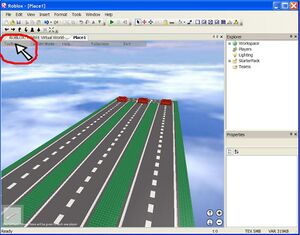
1. Open your place in Roblox Studio.

2. Click "Tools" in the upper left hand corner of the screen, (to the left of "Insert", "Fullscreen" and "Help".)
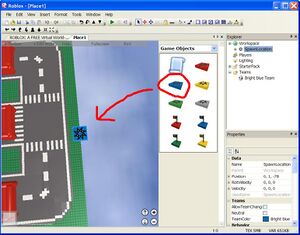
3. Select "Game Objects" from the pulldown menu.

4. Insert a spawn location from the toolbox. This is a small, flat, colored box with spider-like design on it.

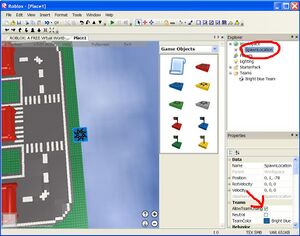
5. In the Explorer pane, click on your spawn location, then click the "AllowTeamChangeOn" box.

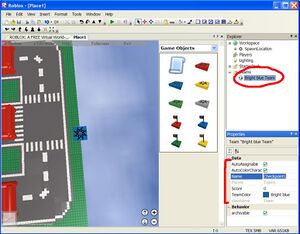
6. In the Explorer pane, click on your team, and you will see various properties of your checkpoint such as team name and color. Check "AutoAssignable" if you want people to spawn at your checkpoint. Check "AutoColorCharacter" if you want people to change colors when they hit your checkpoint.
7. You may also want a leaderboard that shows which checkpoint people have reached. The leaderboard is the parchment paper icon in "Game Objects". (Mouse over the 2 pieces of paper to see which one says "leaderboard". Select this one to insert into the game)