Terrain Generation
First, the way the terrain looks is based off of a number of points, either set randomly or by the user. The terrain generator will try to drag the land upwards or downwards based on the height and position of these points, which I will refer to as "nodes".
When generating the terrain, the terrain generator will go through every part, in the list of parts being worked with, and do the following routine for it:
for each of the nodes do the following:
- check the distance from the node to the current part.
- make a modifier, based on the distance, such as the modifier being the distance/10.
- then if the part is below the node, subtract the modifier from it's vertical size, or if it's above add to it.
The farther away the point is from the nodes(s), the less it will be changed, resulting in a perfectly sloped surface.
But, this is just a simplified version, making the landscape's slope curved is a bit more tricky.
Giving you a hint, it might be something like this:
d = The distance between the node and the part being modified m = the amount the part will be modified by
m = d^(10/d)
this probably won't make a very nice thing though, it will curve too sharply, getting it just right is quite finicky.
Mathematically generated terrain
First, let's define a function that makes a section of terrain, given a function and a range:
 local p = Instance.new("Part")
 p.Anchored = true
 p.BottomSurface = "Smooth"
 p.TopSurface = "Smooth"
 p.BrickColor = BrickColor.new(217)
 p.FormFactor = "Custom"

 function makeTerrain(start, end, steps, func)
     local step = (end - start)/steps
     p.Size = Vector3.new(step.x, 1, step.y)

     for x = start.x, end.x, step.x do
         for z = start.y, end.y, step.y do
              y = func(x, z)

              local position = Vector3.new(x, y, z)
              p.CFrame = CFrame.new(position)
              p:Clone().Parent = game.Workspace
         end
     end
 end
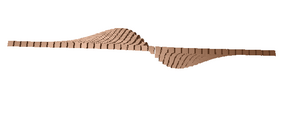
Complex terrain can be created with mathematical formulas. One problem with this, however, is the number of bricks that this entails. Notice the smooth hills and valleys in this picture, which was taken from a side view.
makeTerrain(Vector2.new(-200, -200), Vector2.new(200, 200), Vector2.new(50, 50), function(x, z)
    return x * math.exp(-(x^2 + z^2))
end)
for i = -2,2, .1 do
for j = -2,2, .1 do

y=i*(math.exp(1))^-((i^2)+(j^2))

p = Instance.new("Part")
p.CFrame = CFrame.new(Vector3.new(100*i, 100*y, 100*j))
p.Size = Vector3.new(8,8,8)
p.Anchored = true
p.BottomSurface = "Smooth"
p.TopSurface = "Smooth"
p.Parent = game.Workspace
p.BrickColor = BrickColor.new(217) -- change this to whatever color you want

end
end
Other examples
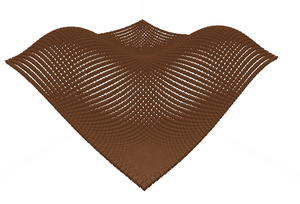
You can get quite fantastic terrains with mathematic formulas.
for i = -3,3, .1 do
for j = -3,3, .1 do

y=math.sin(i)*math.sin(j)

p = Instance.new("Part")
p.CFrame = CFrame.new(Vector3.new(100*i, 100*y, 100*j))
p.Size = Vector3.new(8,8,8)
p.Anchored = true
p.BottomSurface = "Smooth"
p.TopSurface = "Smooth"
p.Parent = game.Workspace
p.BrickColor = BrickColor.new(217) -- change this to whatever color you want

end
end
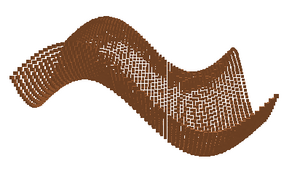
for i = -3,3, .1 do
for j = -3,3, .1 do

y=math.sin(i)+math.sin(j)

p = Instance.new("Part")
p.CFrame = CFrame.new(Vector3.new(100*i, 100*y, 100*j))
p.Size = Vector3.new(8,8,8)
p.Anchored = true
p.BottomSurface = "Smooth"
p.TopSurface = "Smooth"
p.Parent = game.Workspace
p.BrickColor = BrickColor.new(217)

end
end
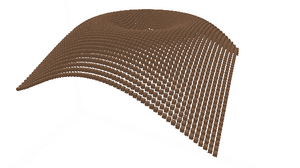
It's hard to describe this. Imagine a volcano. There's a dent in the middle, and then it bends back up at the corners.
for i = -3,3, .1 do
for j = -3,3, .1 do

y=math.sin(math.sqrt(i^2+j^2))

p = Instance.new("Part")
p.CFrame = CFrame.new(Vector3.new(100*i, 100*y, 100*j))
p.Size = Vector3.new(8,8,8)
p.Anchored = true
p.BottomSurface = "Smooth"
p.TopSurface = "Smooth"
p.Parent = game.Workspace
p.BrickColor = BrickColor.new(217)

end
end
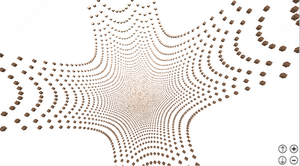
We can give a completely new definition to falling down a pit with mathematical functions.
for i = -3,3, .1 do
for j = -3,3, .1 do

y=math.log (6) * (i^2 + j^2) - 2

p = Instance.new("Part")
p.CFrame = CFrame.new(Vector3.new(100*i, 100*y, 100*j))
p.Size = Vector3.new(8,8,8)
p.Anchored = true
p.BottomSurface = "Smooth"
p.TopSurface = "Smooth"
p.Parent = game.Workspace
p.BrickColor = BrickColor.new(217)

end
end
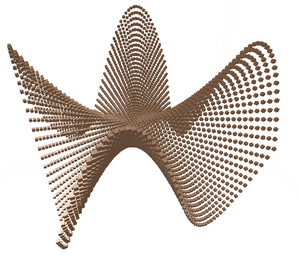
There really is no limit to the mathematics, it's only limited by the computers and the program.
for i = -3,3, .1 do
for j = -3,3, .1 do

y=(i^3*j-i*j^3)/(i^2+j^2)

p = Instance.new("Part")
p.CFrame = CFrame.new(Vector3.new(100*i, 100*y, 100*j))
p.Size = Vector3.new(8,8,8)
p.Anchored = true
p.BottomSurface = "Smooth"
p.TopSurface = "Smooth"
p.Parent = game.Workspace
p.BrickColor = BrickColor.new(217)

end
end
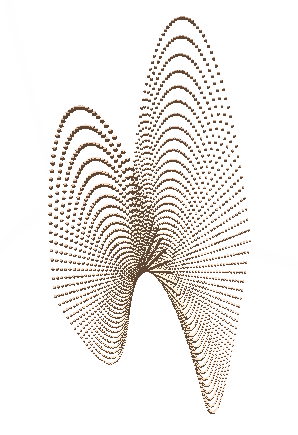
I'm not sure how useful this is. For more on this shape, see the wikipedia article on this shape.
for i = -3,3, .1 do
for j = -3,3, .1 do

a=1
b=1

y=(i^2)/a^2-(j^2)/b^2


p = Instance.new("Part")
p.CFrame = CFrame.new(Vector3.new(100*i, 100*y, 100*j))
p.Size = Vector3.new(8,8,8)
p.Anchored = true
p.BottomSurface = "Smooth"
p.TopSurface = "Smooth"
p.Parent = game.Workspace
p.BrickColor = BrickColor.new(217)

end
end
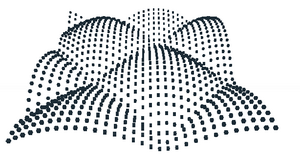
for x = 1,10, .3 do
for z = 1,10, .3 do

y=math.abs(math.cos(x)+math.cos(z))^.5

p = Instance.new("Part")
p.CFrame = CFrame.new(Vector3.new(10*x, 10*y, 10*z))
p.Size = Vector3.new(1,1,1)
p.Anchored = true
p.BottomSurface = "Smooth"
p.TopSurface = "Smooth"
p.Parent = game.Workspace
p.BrickColor = BrickColor.new(26)

end
end
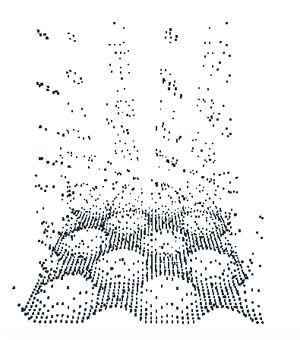
You can get quite fancy mountainous terrains with simple functions, although these will take lots of bricks.
for x = 1,15, .3 do
for z = 1,15, .3 do

y=math.abs(math.cos(x)+math.cos(z))^4

p = Instance.new("Part")
p.CFrame = CFrame.new(Vector3.new(10*x, 10*y, 10*z))
p.Size = Vector3.new(1,1,1)
p.Anchored = true
p.BottomSurface = "Smooth"
p.TopSurface = "Smooth"
p.Parent = game.Workspace
p.BrickColor = BrickColor.new(26)

end
end
See also
- Randomly generated terrain*
- 3D Graph-in-a-Box -- A page where you can see what various 3D mathematical functions would look like (which would come in handy if you wanted to make terrains.)