User:Quenty/TutorialForNjr2012
From Legacy Roblox Wiki
Jump to navigationJump to search
 |
Do not edit! The creator of this subpage does not want it to be edited without permission. |
How to get into studio, and upload models!
Opening up ROBLOX Studio can sometime be confusing. Here is a step by step outline on how to open up studio, and the command bar.
- Start (Bottom Right Corner)
- Click on the start button of your computer.
- All Programs
- Click on 'All Programs'
- ROBLOX
- Scroll down the list of programs until you find ROBLOX. Click on the folder to open it up. (Expand it)
- Roblox Studio
- Click on 'ROBLOX Studio', wait for it to load
- Navigate (In the browser that pops up) to your game
- In ROBLOX Studio (The thing that pops up), find your game (You may have to log in).
- Push 'Edit' in the browser
- Push the brown/yellow/organize colored 'Edit' mode button.
- Wait for the game to load
- Wait for your game to load and open up in studio.
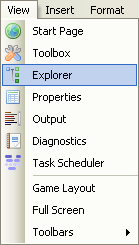
- Open up the Explorer bar
- Look at the top left bar
- Look at the top left bar and click on View

- Click on 'Explorer'
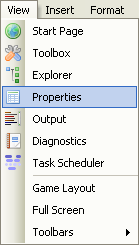
- Look at the top left bar
- Look at the top left bar and click on Properties
- Click on 'Explorer'
- Look at the top left bar
- Build what you want to be a model (or have it prebuilt)
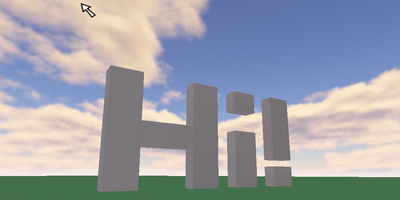
It says 'Hi'. It's the new model that will be built.
.png)
.png)

- Select your model....

One your model is built, drag a box around ALL of the bricks that you want to be part of the model. Make sure you have them all selected.

- Group the items
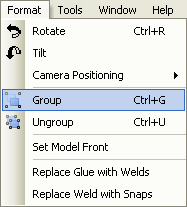
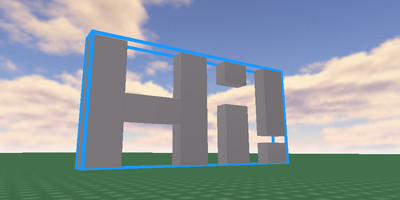
Once you have them all selected, click the Group button on the toolbar, or press the keyboard shortcut CTRL and G. A blue box will appear around the entire collection of bricks. This shows you that the bricks are now part of a model!
.png)

- Upload the model
- Make sure your model is is still selected. If it isn't, then you will not be able to select it. see the step 2 above if you have somehow unselected it.
.png)
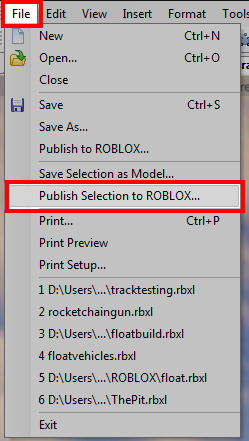
With your model still selected go to file. Then click on 'Publish Selection to ROBLOX'

- A window should pop up
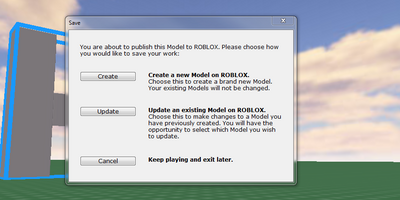
A window will pop up asking you what you want to do. Since you want to save a new model, hit Create.

- Enter the name and description.
- Select public domain if you want it to be a 'Free Model' If you don't, then make sure it's false (un-checked). You can change this later. (Send me a PM for this, is you need to change it).

- Find it!
- You can find your model on the ROBLOX website now. To find it, you'll have to look in your stuff, then click on the 'Models' tab.
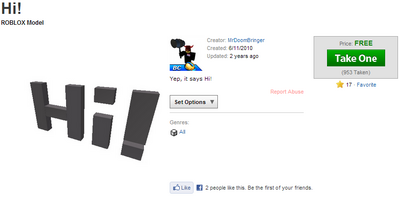
Hit publish, and your model will appear on the Roblox website!

STILL DON'T GET IT?
After that massive tutorial, if you still don't get it, watch this video: